International Quilt Association Silent Auction

27 09 2019

It has been a long time since I used this blog but I have something to talk about so here we are again.  I am teaching at Festival of Quilts in Houston again this year.  It is always an honour to be included in the Houston faculty.  This year I got an email from the coordinator of the IQA silent auction asking for a small quilt to be included in the auction.  After the initial shock of being asked, I got a bit of an idea of what I was going to do.  Of course, I then went to Birmingham, got busy and have left it until the very last minute to put this quilt together.  As it is now on its way to the US, I am able to share my process with you.

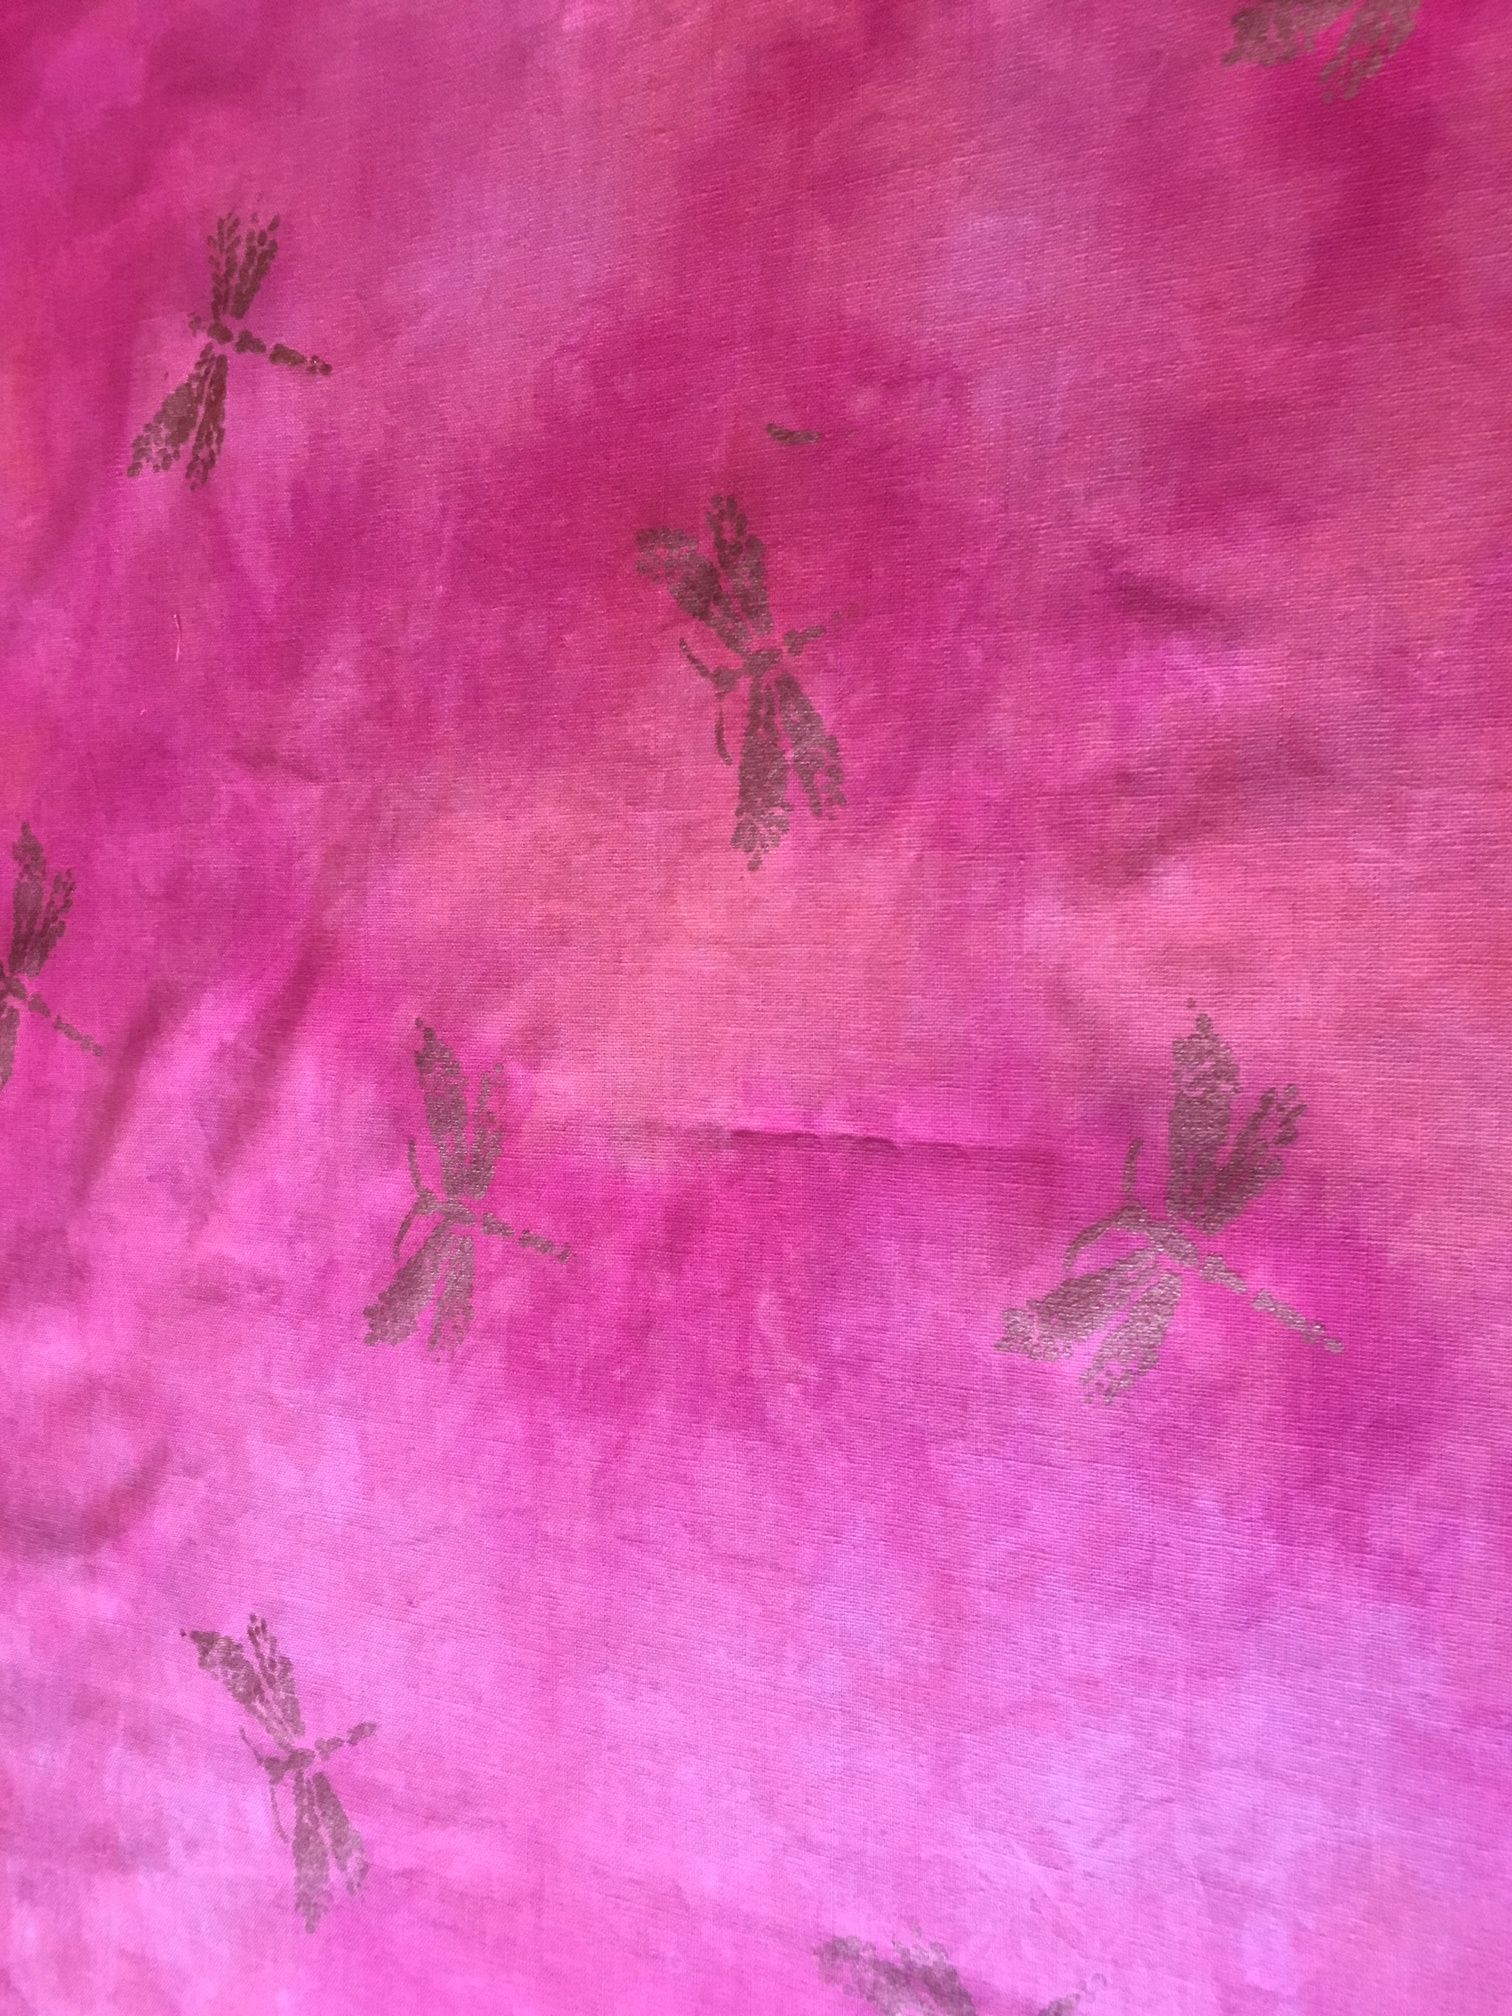
I knew immediately the colourway I wanted to work with and it all started with a metre piece of handdyed linen. This one to be precise:

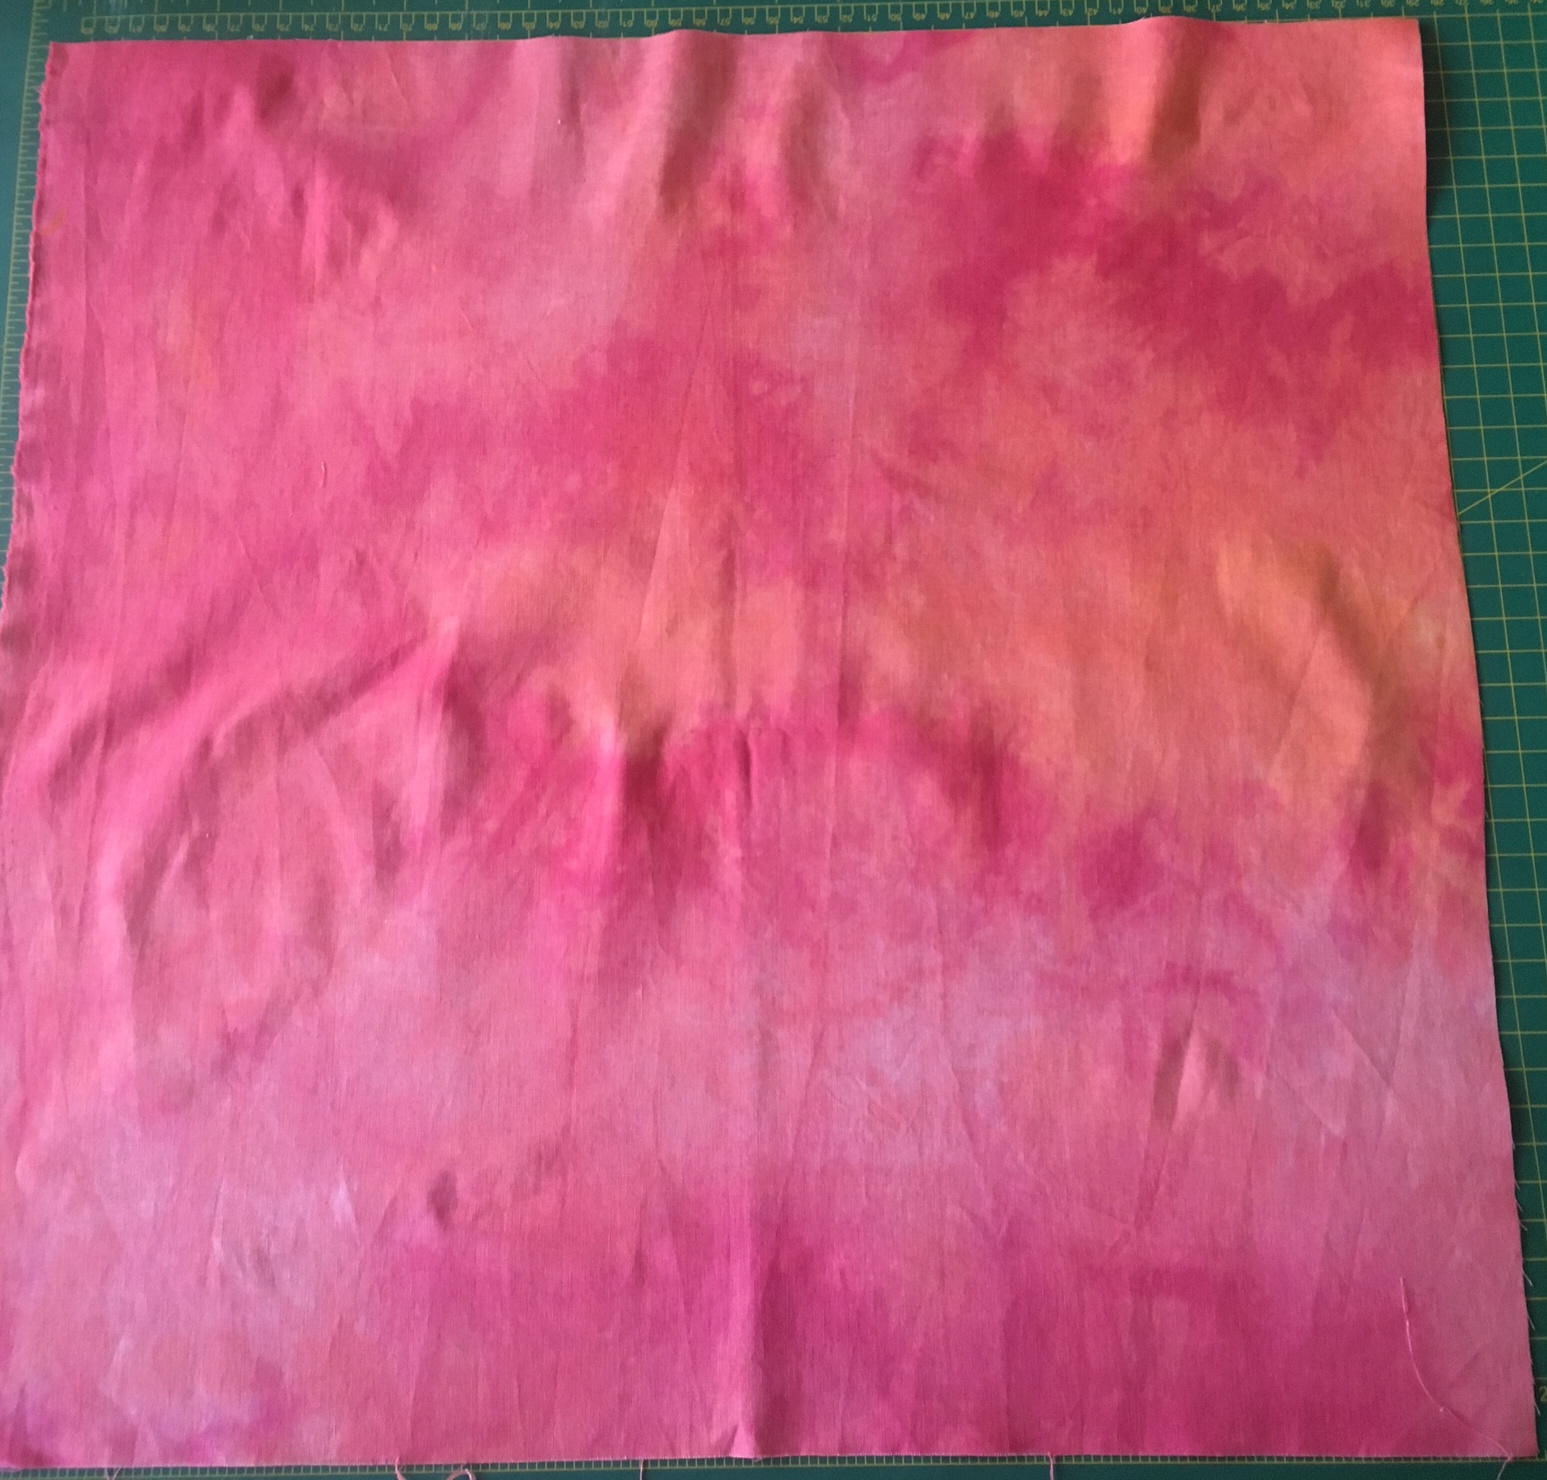
I then followed my general process for many of the quilts I make.

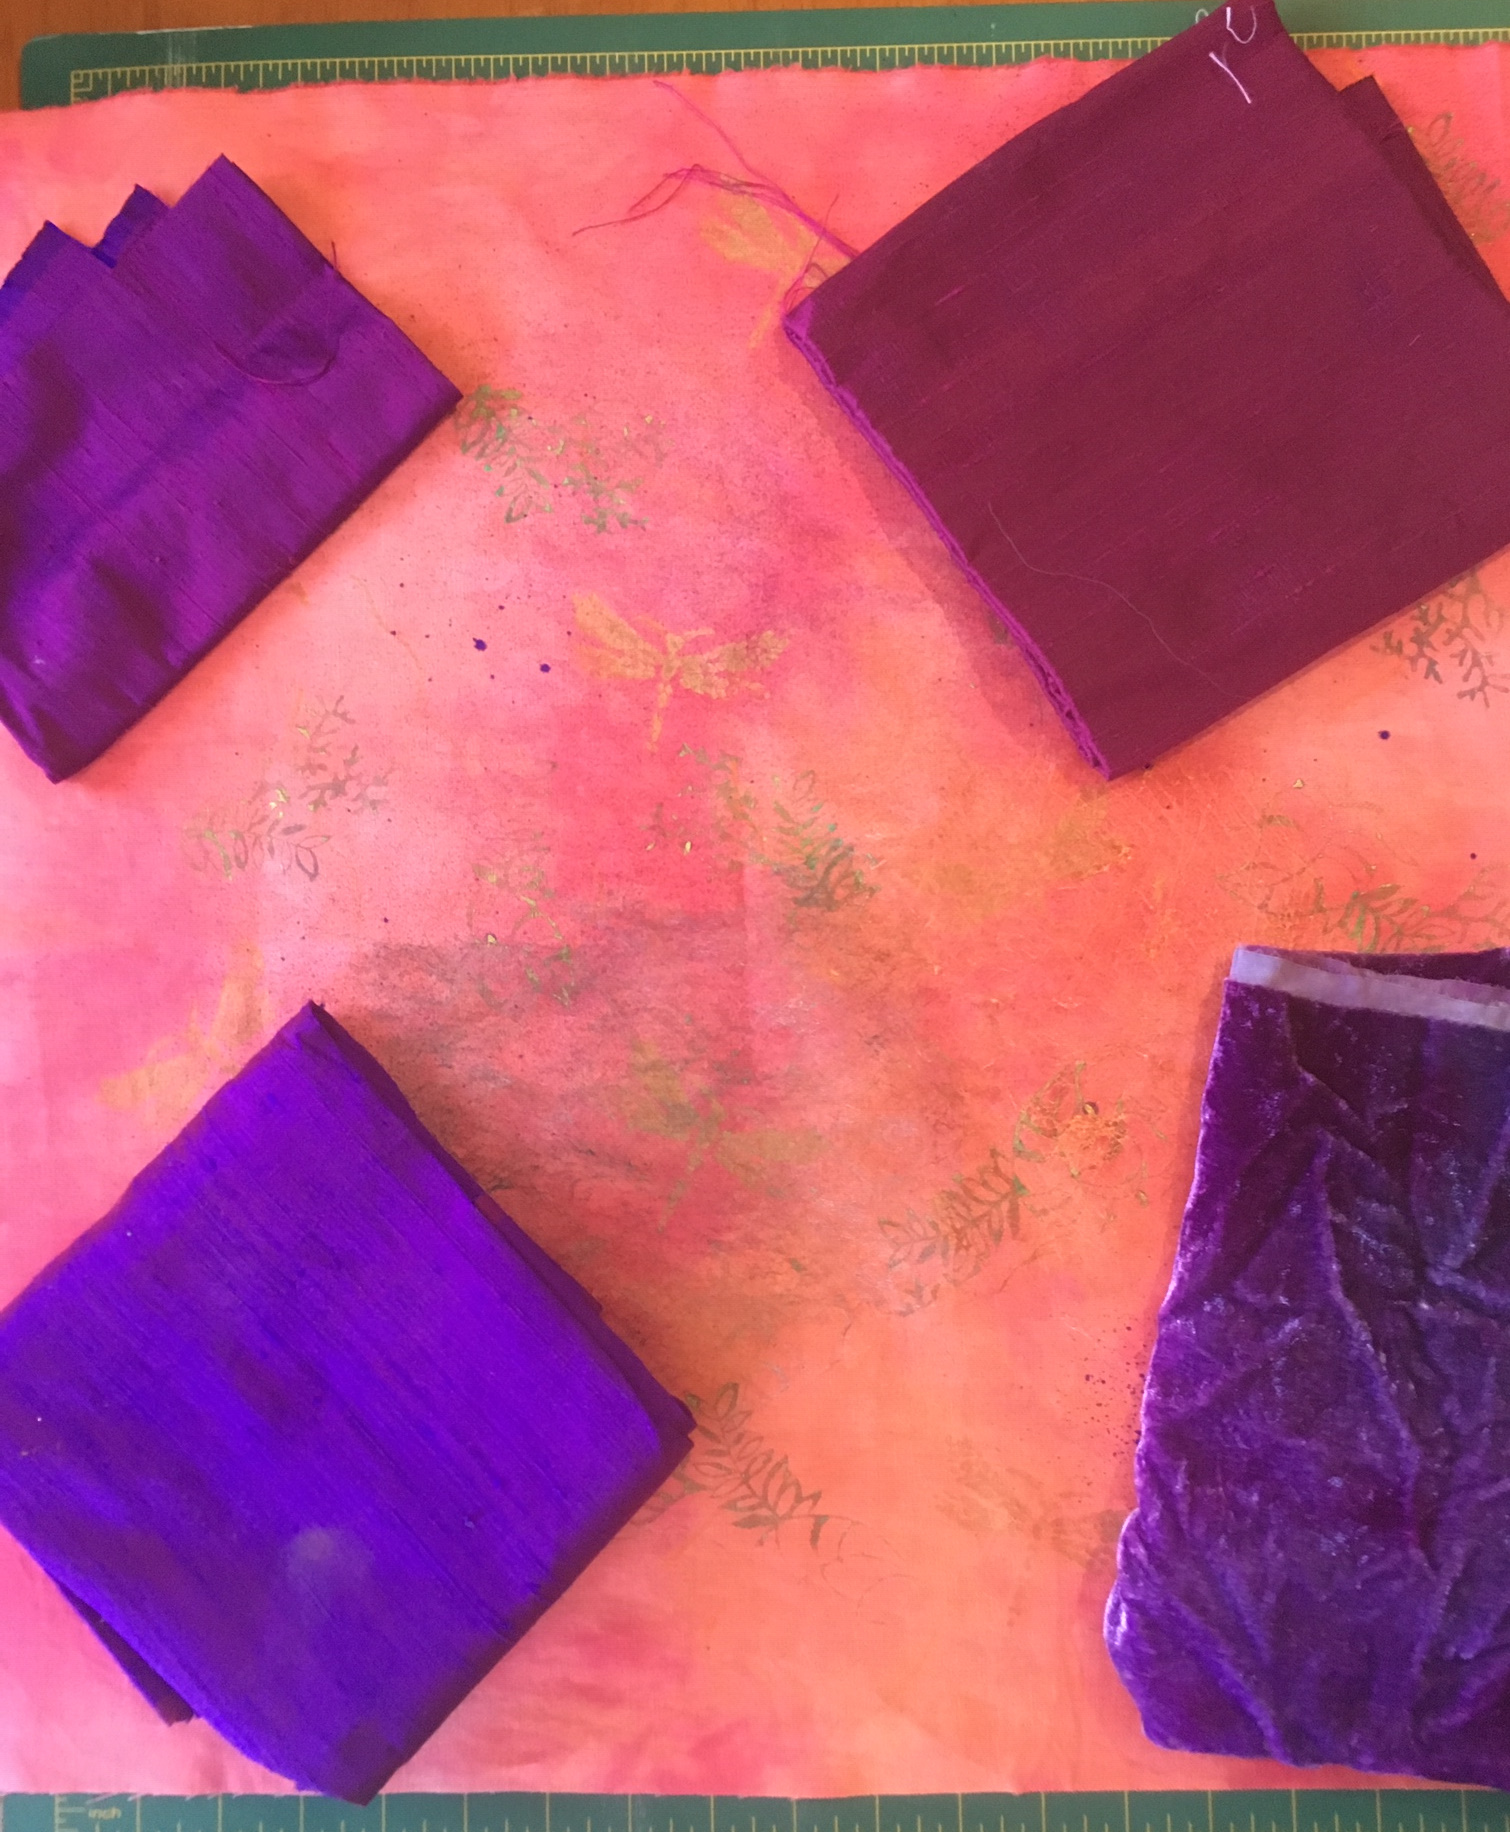
I selected some hand dyed velvet, silk dupioni, cotton scrim and some wool and acrylic yarn for highlights.

Then I set about to create texture in the background with paint and a few other bits and pieces.


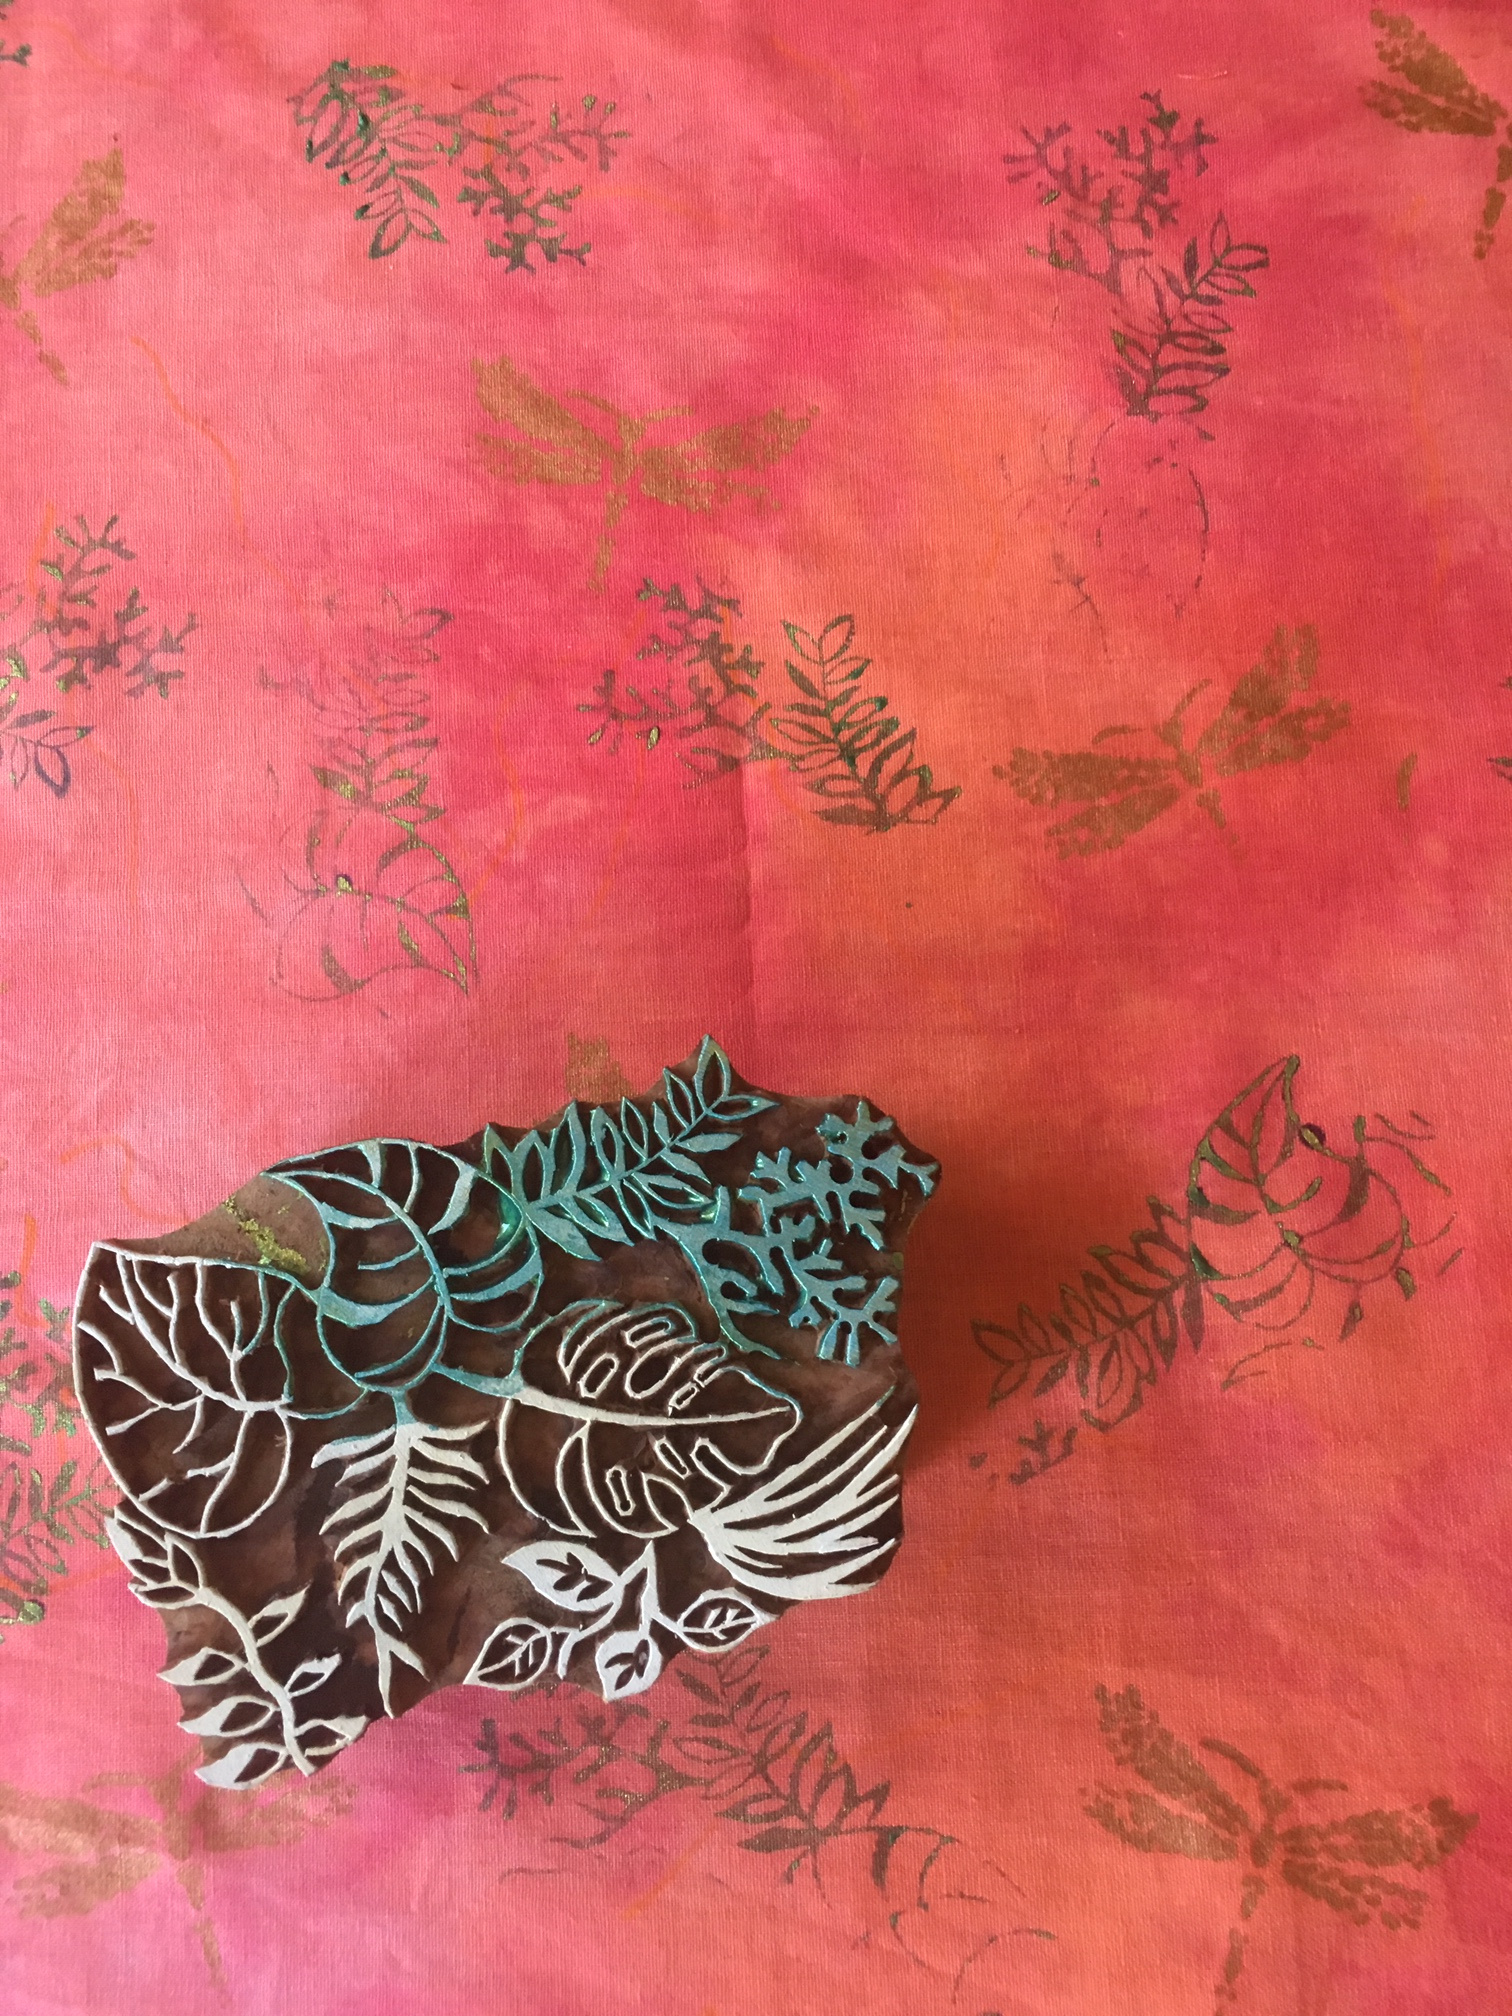
I used Lumiere paints because they are the best.  First I used a stencil to add the dragonflies.  This stencil is one of my absolute favourites and I reach for it often, or pretty much all the time.  I then used a block print to add some ‘greenery’.


When I auditioned my fabrics on the painted surface, I needed more depth and a bridging colour.


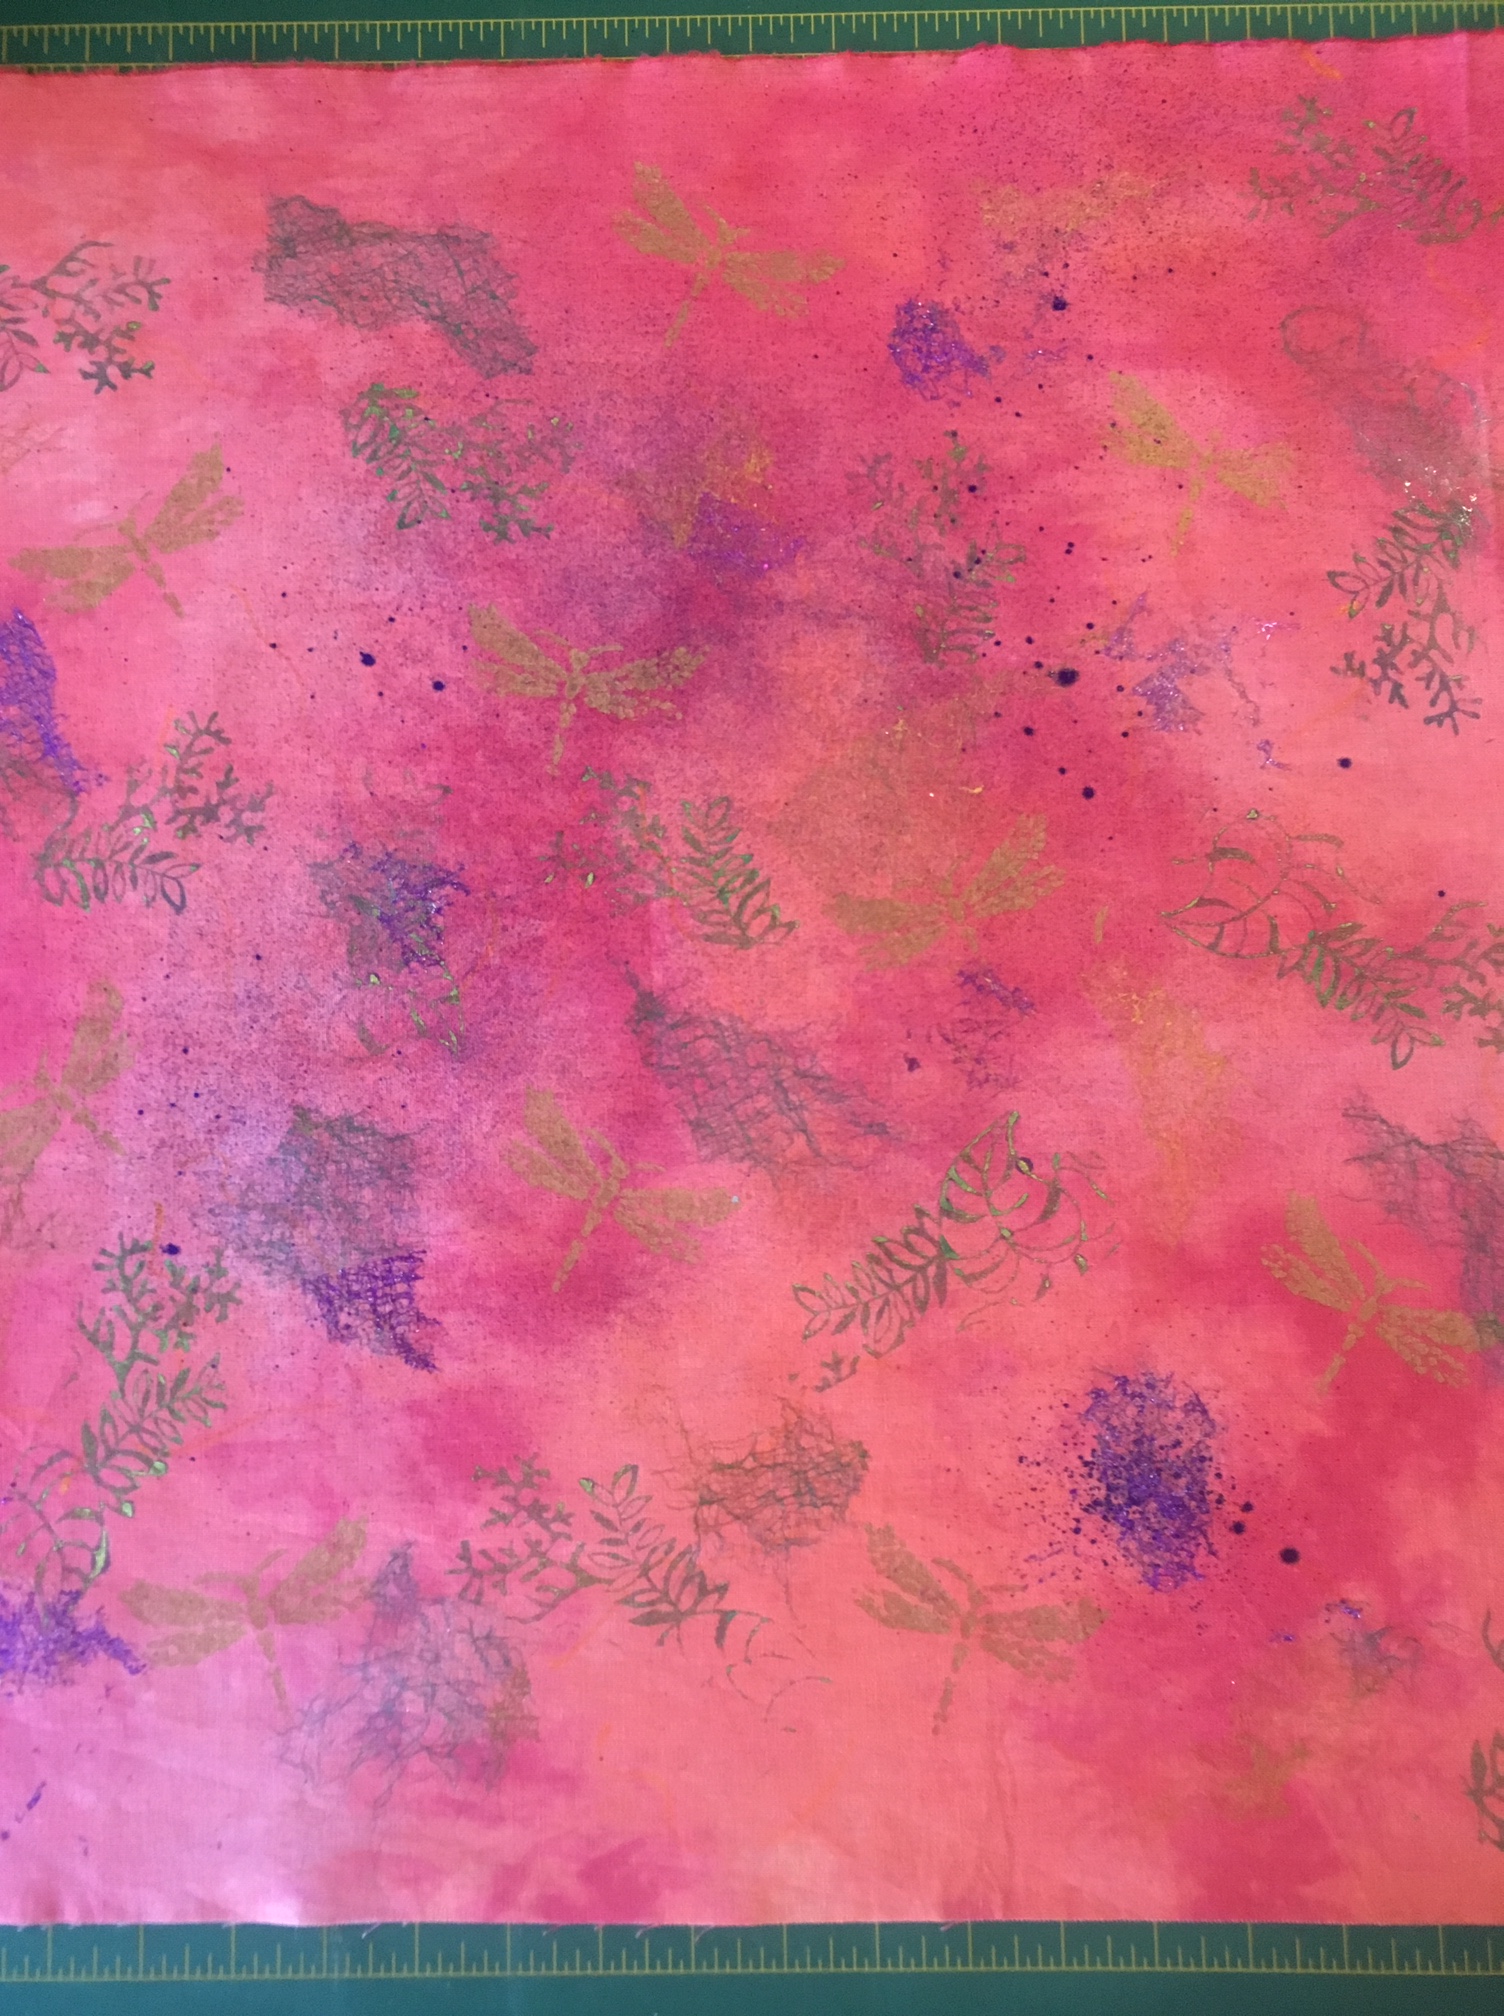
So,  I added some depth by misting diluted purple Dye Na Flow in the centre of the piece.  Next came some painted Mistyfuse and off course, some foils.

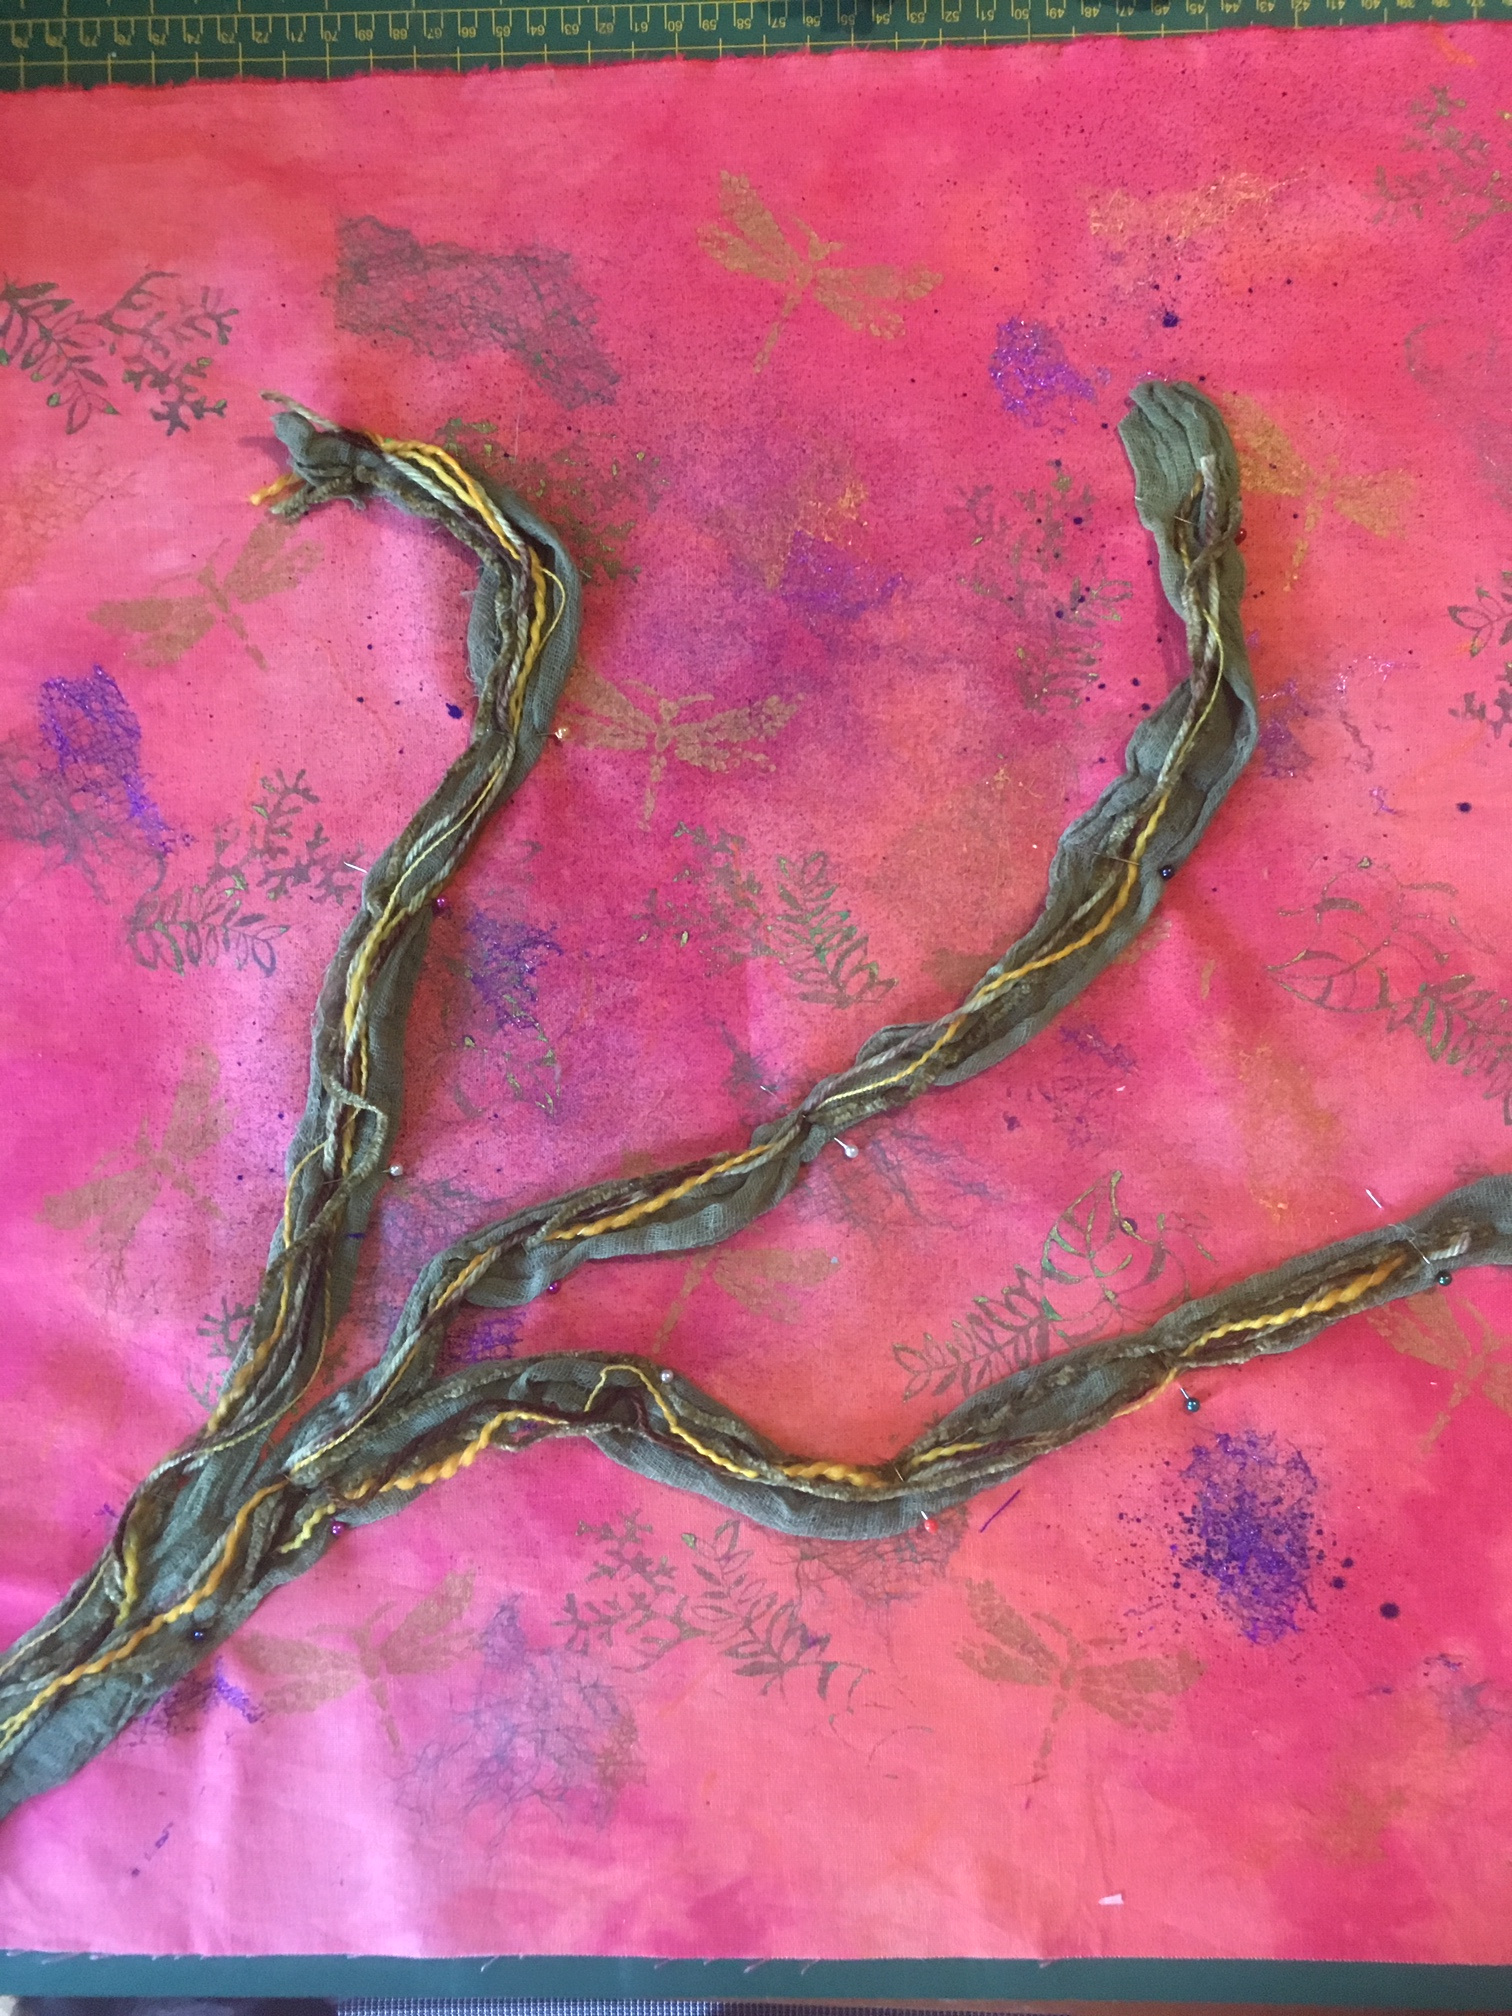
Here is the finished painted surface


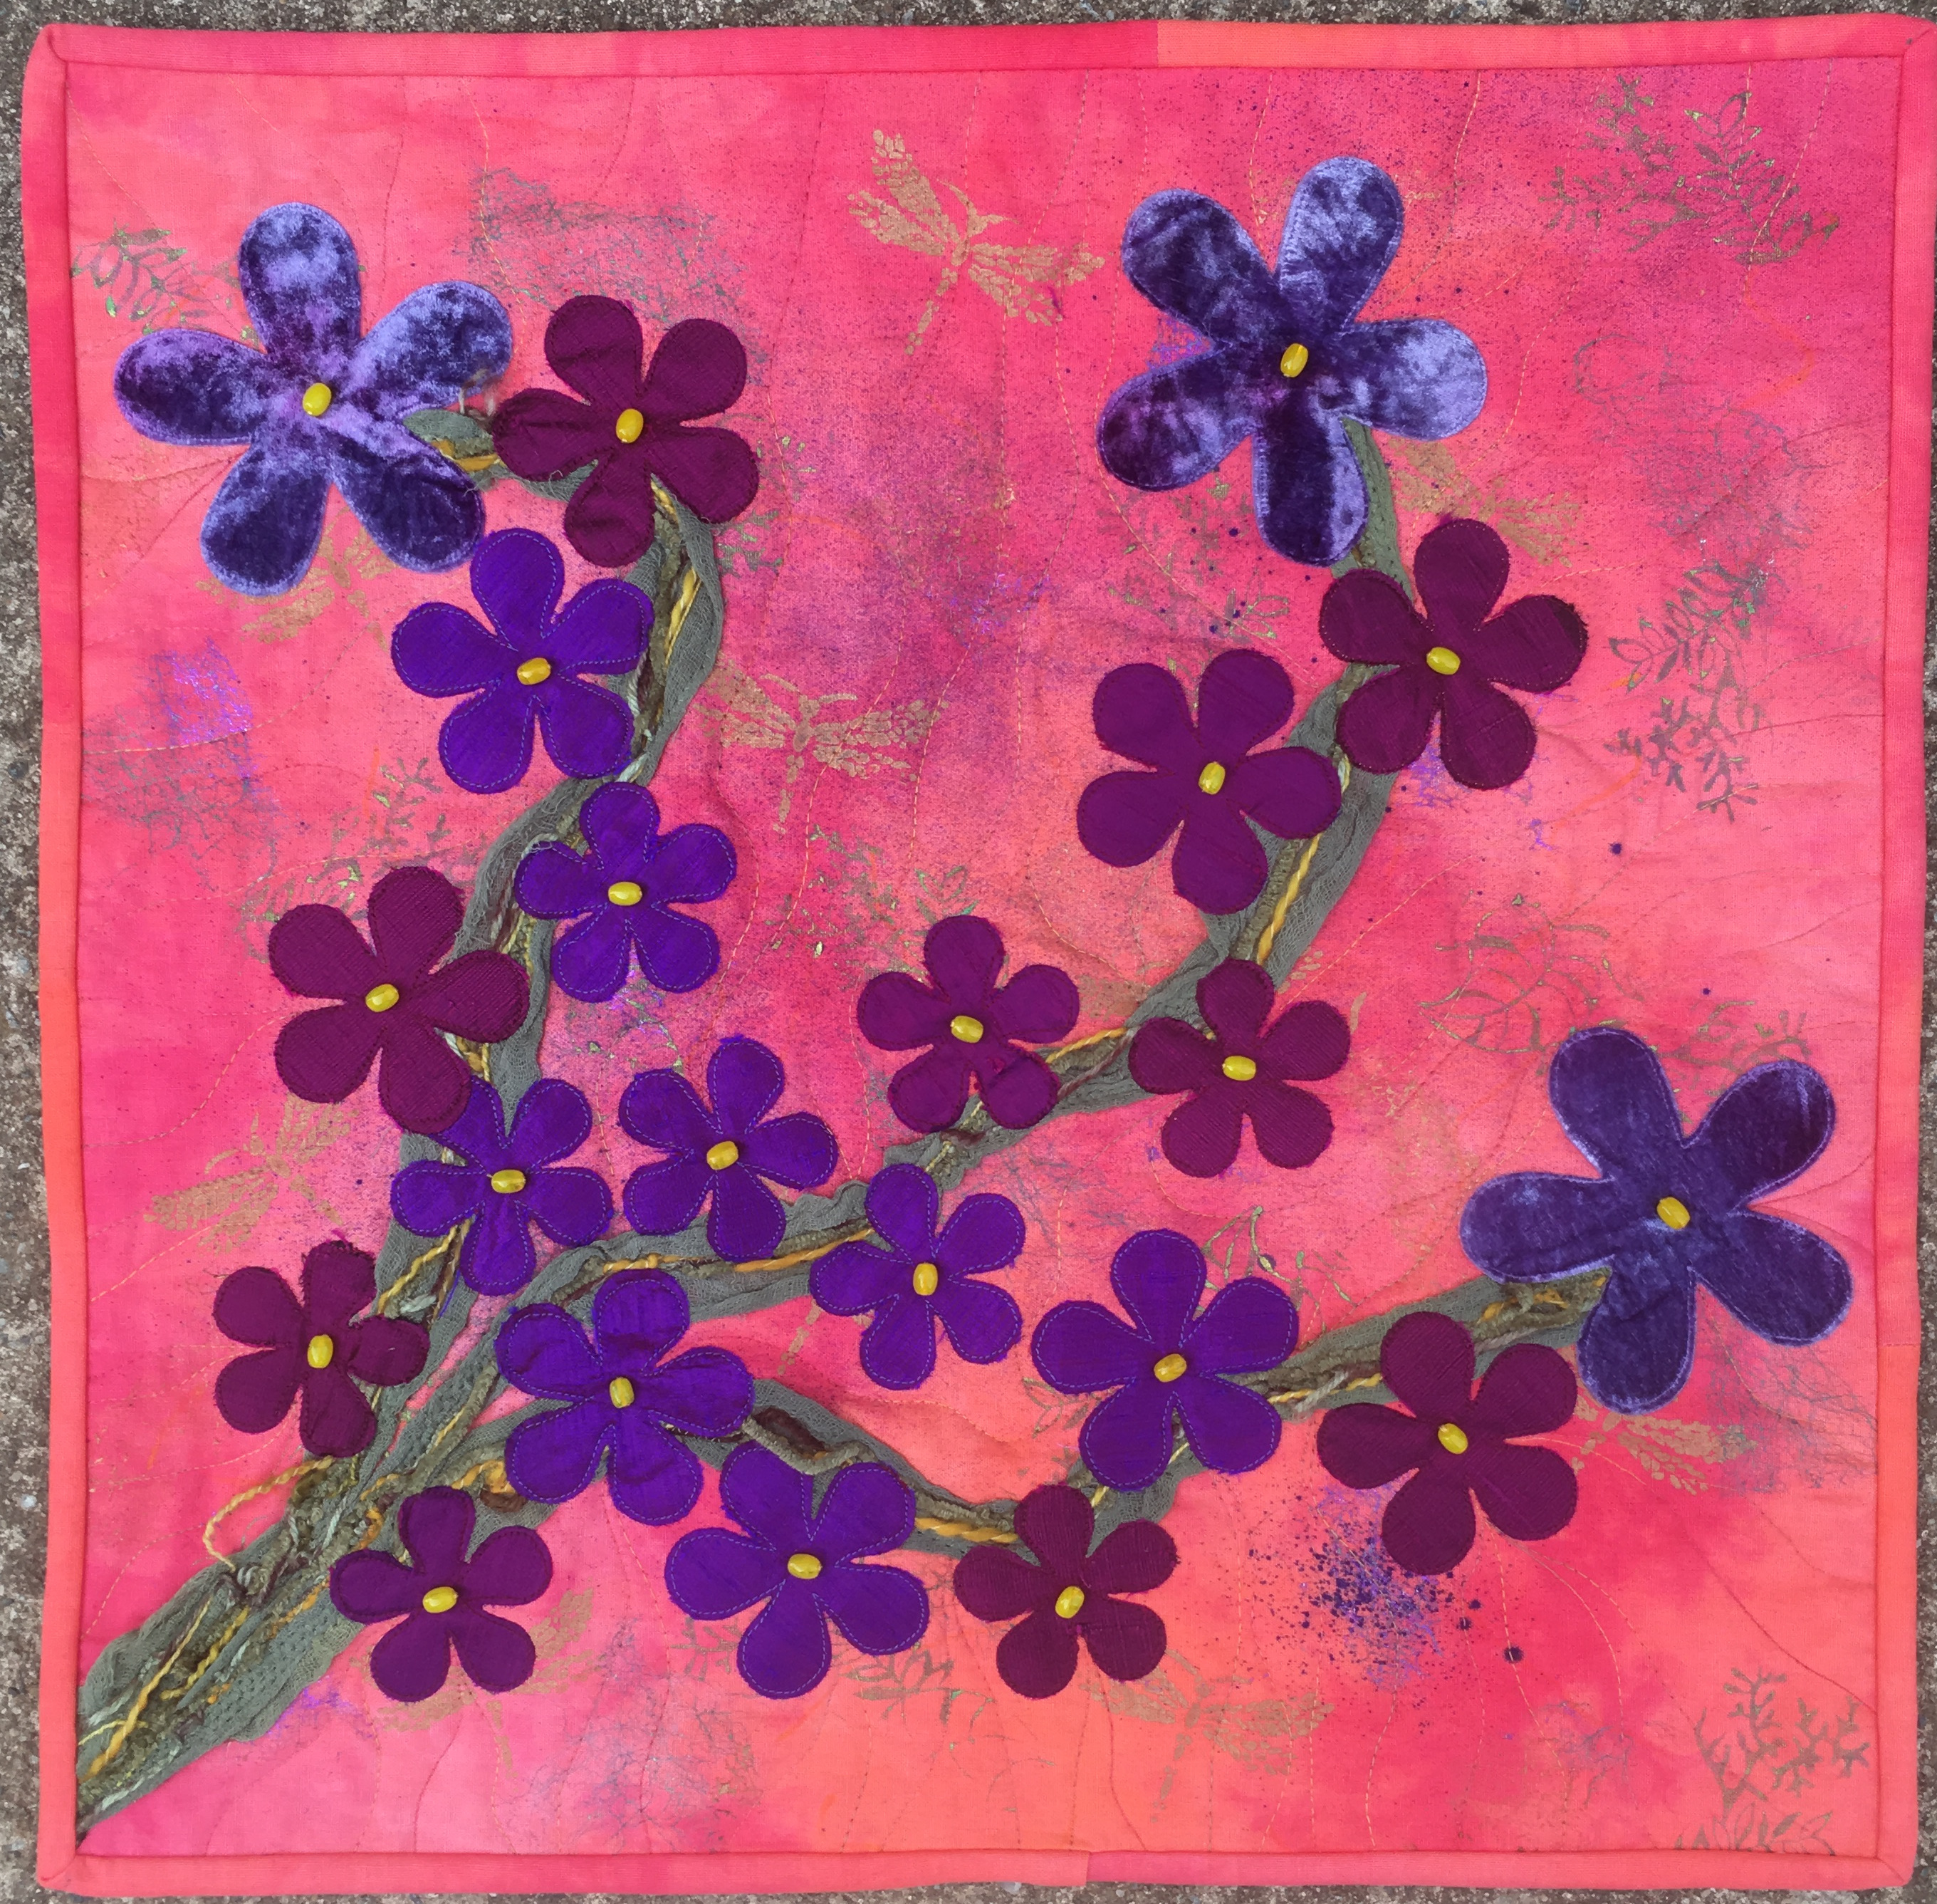
Next I used the cotton scrim and yarns to create the framework of the piece; the stems of my plants.


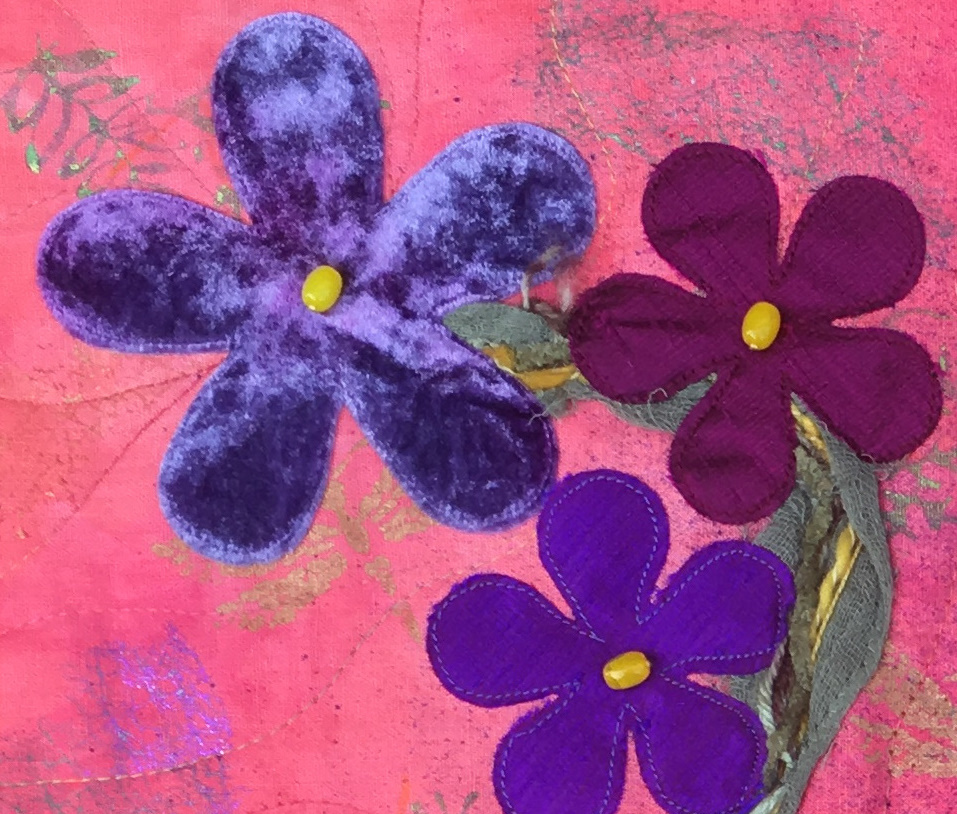
I cut my flowers on a Sizzex.  This shape is a regular of mine as I really like both the range of sizes I have but the rounded symmetry this shape creates.  I have flowers in three different sizes.  The largest are in my hand dyed velvet.  Then I cut three different silk dupioni fabrics in the two smaller sizes.  I always cut more than I need as I select them randomly.  Nature is very arbitrary and random, so by letting chance select my flowers, I have a better chance of it looking organic.


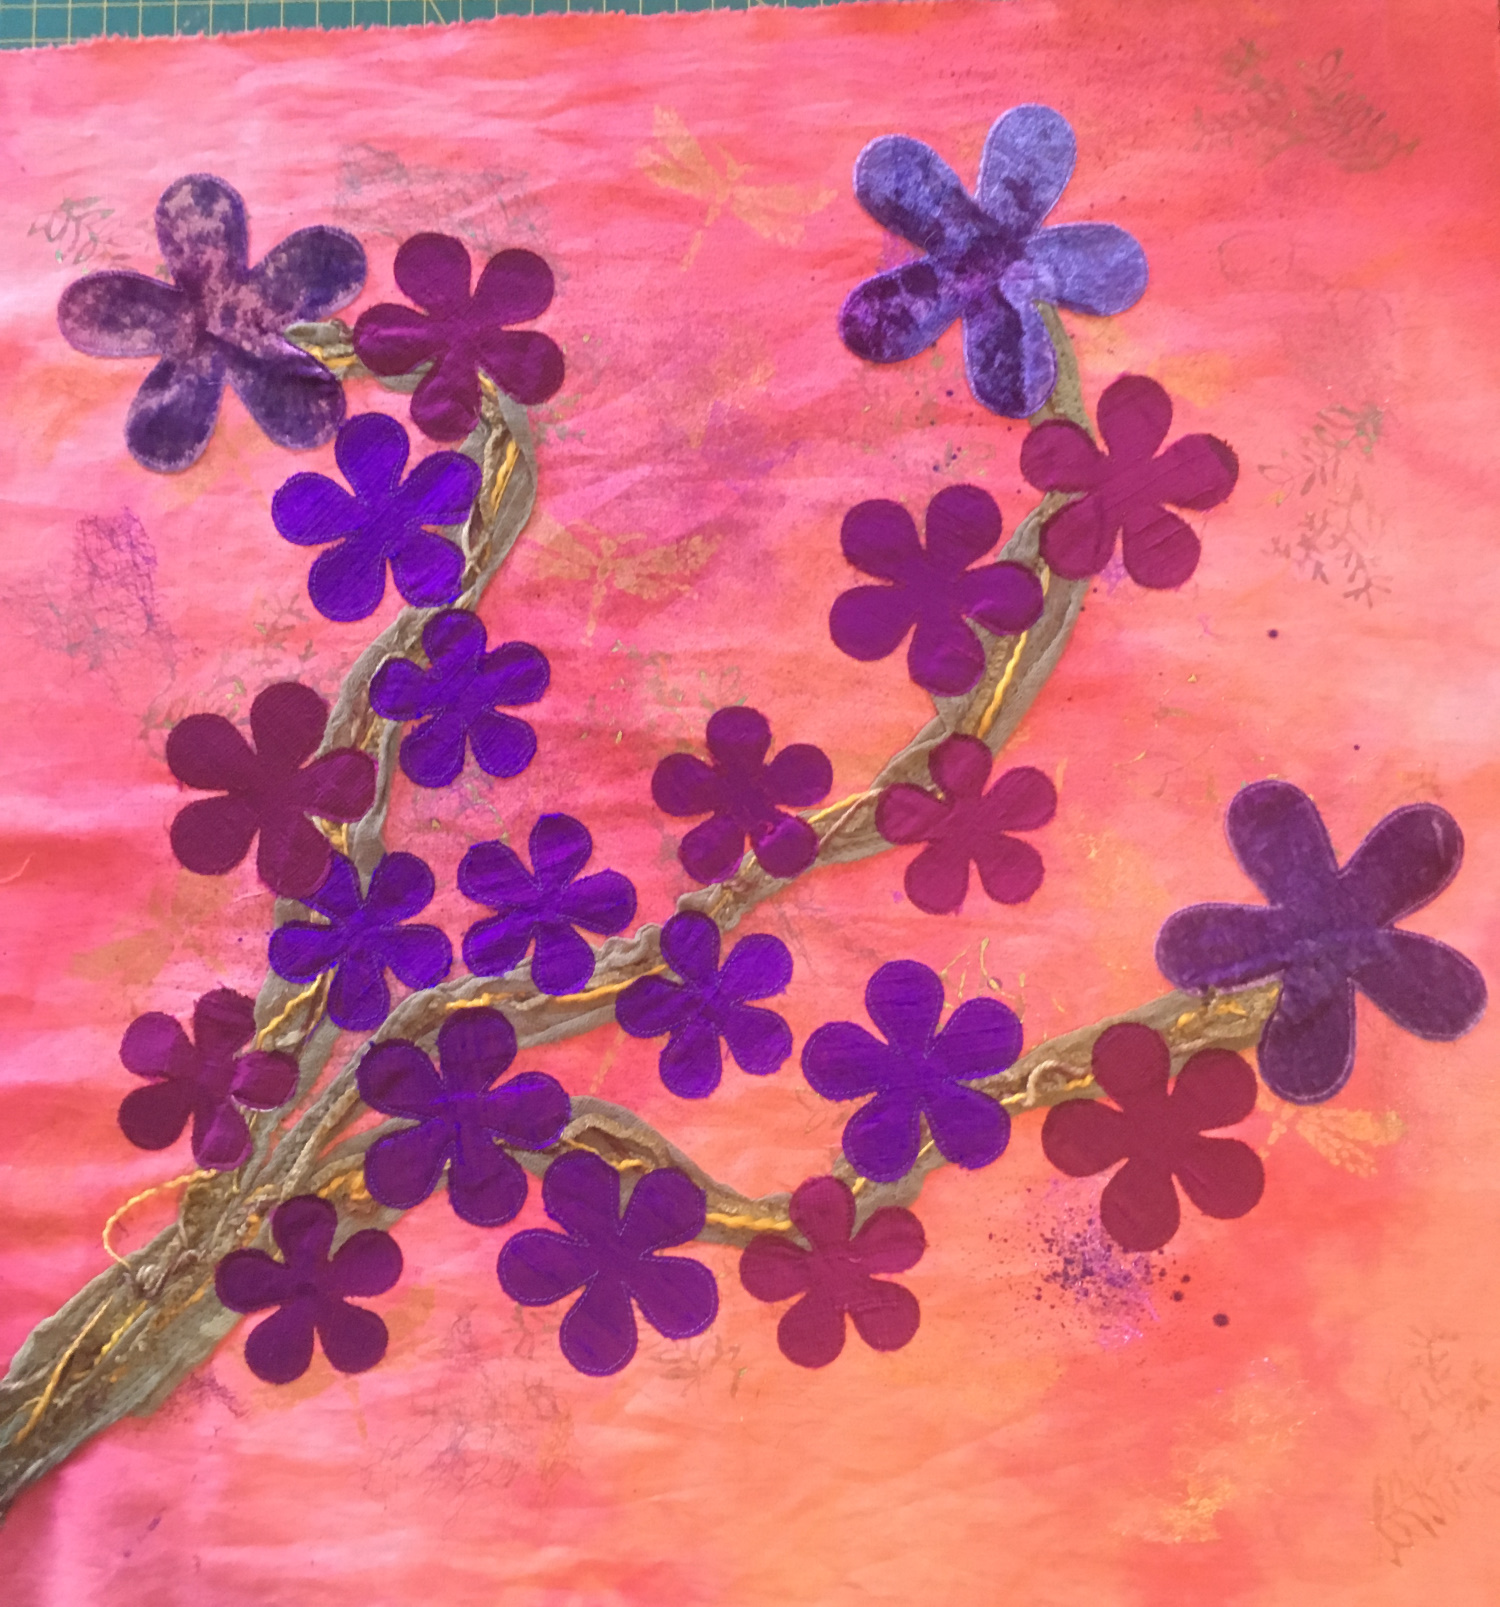
I stitch around the edges of all my applique with a simple straight stitch.  A more traditional blanket stitch would not suit the aesthetic of most of my work.  And I don’t want the stitching to dominate.  If I want a stronger line, I will do a machine satin stitch, but I don’t do that often.

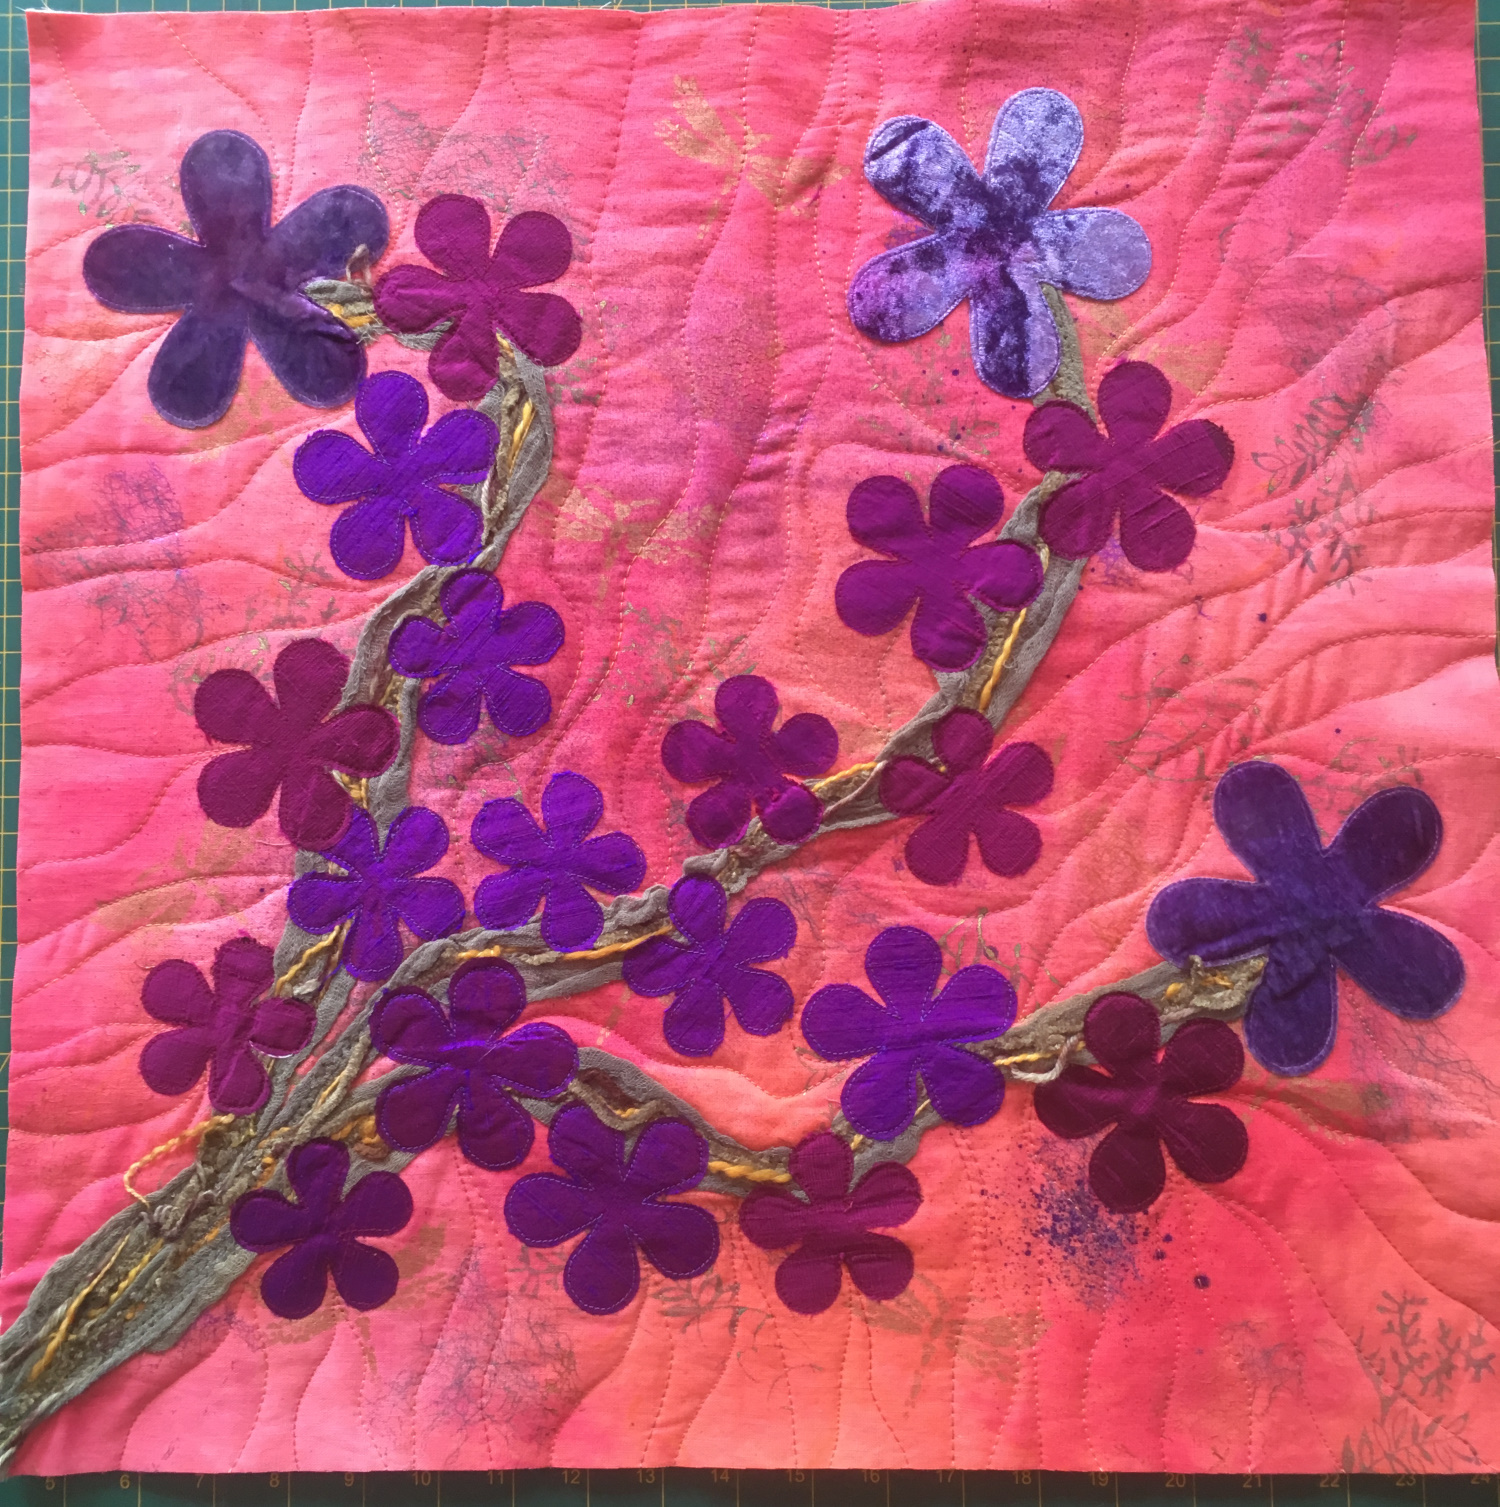
My label was printed on cotton and adhered to the backing and I was on the home stretch.  Then came the quilting.


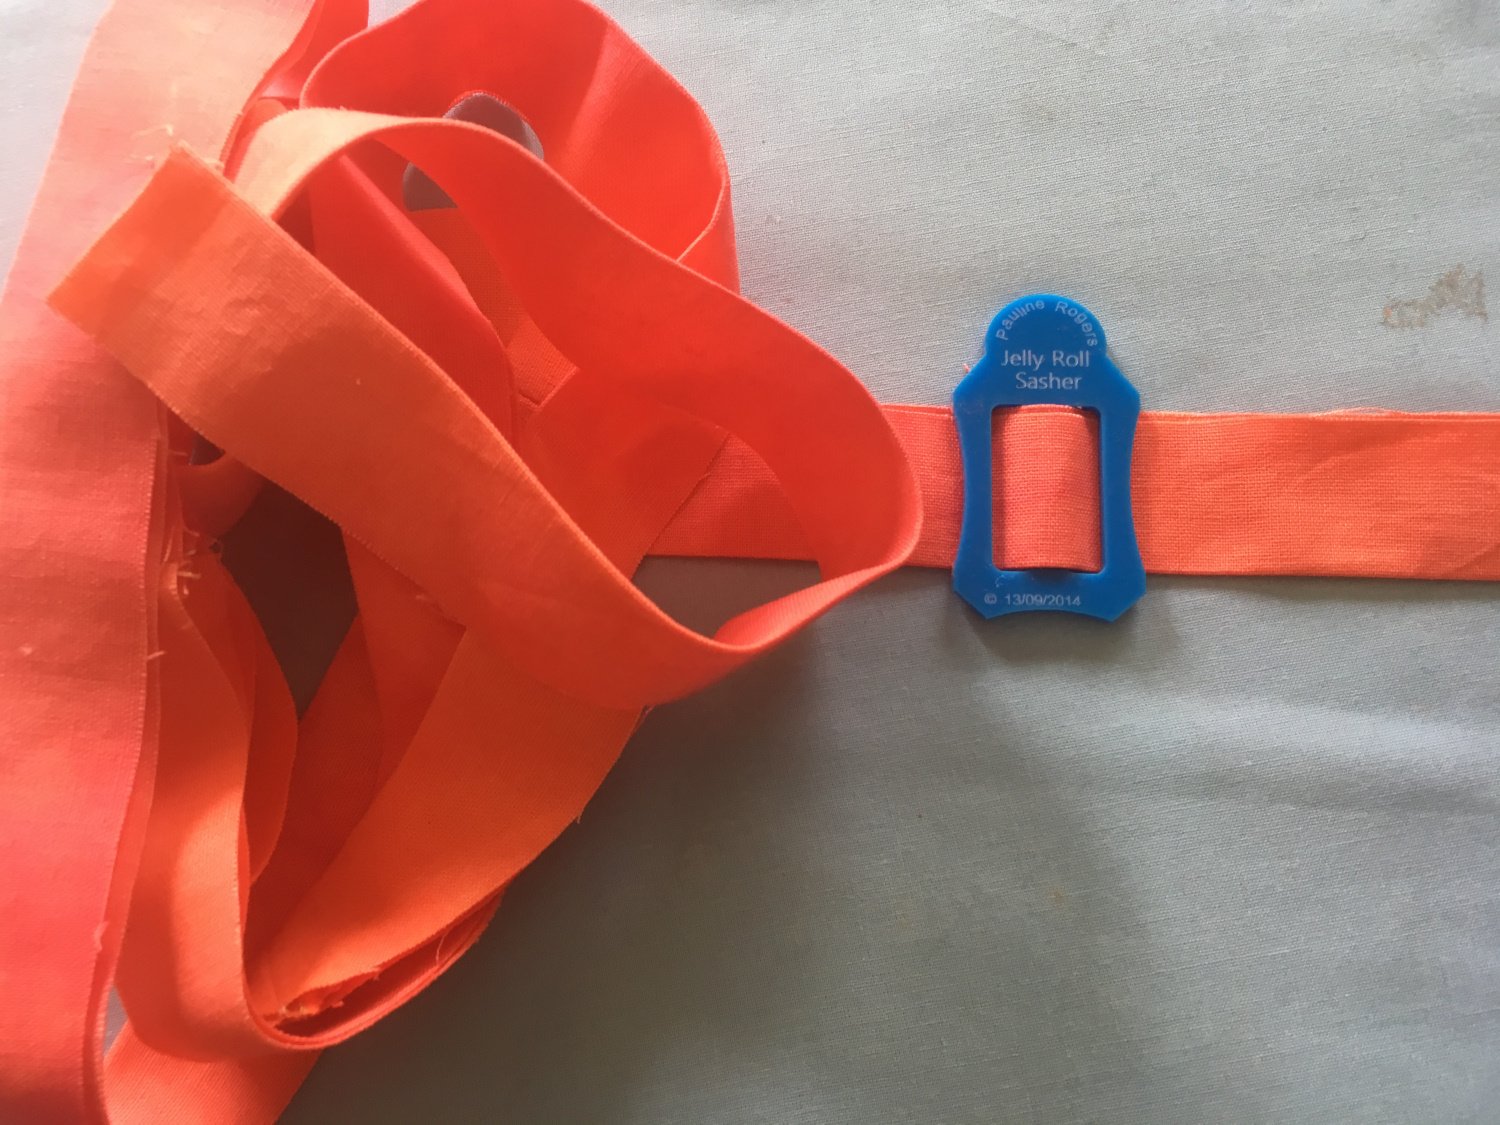
I used the 2.5 inch Jelly Roll sasher from Paulines Quilters World for my binding.  The linen has more stretch than a standard patchwork cotton so it was a bit more temperamental to run through the sasher than cotton would have been, but this process is quick and easy and fool proof.


With the binding and hanging sleeve stitched down.  I finished off by adding bright yellow, opaque beads.  I use a LOT of complementary colourways for the pop and this quilt was no exception.  Over all the piece is bright, warm and spring-like.  I hope it raises some money for the IQA in the silent auction.


Adding metals to your work

30 01 2017

I love adding different sorts of media to a collage or art quilt.  Different materials bring the characteristics of that material to the piece and extend the impact.  One of my favourites is metal.  Metal can be added in a lot of different ways.  In this post, I will show you how simple it is to stitch metal to fabric.  This blog post is an extract from one segment of my Tremendous Textiles online class.  Information on joining that class can be found here:  http://www.uniquestitching.com.au/p/9144486/online-class—tremendous-textile-art-techniques-2017.html

Working with metal can be a bit intimidating to some people, but there are lots of different metallic elements that can be added to a fibre art project that can be extremely effective.  At their most basic, metal charms, buttons and old jewellery can really focus a project.  Sometimes you just need something small to be an offset to a focal point or to add a bit of light or interest to the project and sewing a charm or other small metal element might be the perfect thing.

At other times, adding metal can be a significant part of the project.  In this segment of the course, I am going to focus on adding metal as a focal point or a major media in the form of metal shim.

Metal shim is very fine metal cut into sheets.  Most of the shim is aluminium that has been coated with colour.  However, some is 100% copper (which I love).  You can get different weights, but generally the craft quality shim does not publish the weight.  This can be a little challenging if you are looking for something specific, but most of the brands produce a light weight, flexible shim that is easy to handle and work with.  You can buy the commercially available metals, or you can use aluminium soft drink cans; just cut off the top and bottom and slice the cylinder into one sheet.  I don’t drink any form of soft drink, so see the $8 to $10 per packet of shim far better value, but if you wanted to explore this technique broadly, you could raid the local recycling depot.

The Art Emboss brand has a light and a medium weight.  The light weight is equivalent to most other craft brand metal sheets or shim.

These are the brand that I use and have on my website at the moment.

When using shim, you can cut it with scissors, a rotary cutter or die cutting machine.  You can emboss it manually or in embossing sleeves and you can hand or machine stitch through it.

Most of the coloured aluminium is plain silver on one side and coloured on the other.  You can mix up using both sides for variation or you can sand back some of the colour to expose silver.  This is particularly effective if you emboss the shim and sand back the colour from the raised areas.  You can also add colour to the shim.  Colour products designed for non porous surfaces are the most effective.  For example, alcohol inks and StayzOn ink pads are great for colouring metal.  Embossing powder is very effect too.

The very bright piece above has blue coated aluminium shim.  The shim has been embossed in embossing sleeves and then alcohol ink has been splattered. The metal is sewn to lutradur and felt.

Another very effective combination of materials is shim that has photo transfers.  Transfer Artist Paper works well for this or sheer fabric like the organza can be stitched over the metal shim.  The shim continues to catch light through the photos and can look quite stunning.

In its simplest form, we can stitch it, as is onto a fabric background or applique onto the shim and then stitch it down.  This is what I am showing you on the video and the finished piece is shown below.

To emboss your metal by hand, you can use line drawings or stencils for the basic shape.  There is a really good tutorial on using stencils to emboss metal by Magdalena Muldoon for Stencil girl.  You can find it here:  http://www.stencilgirltalk.com/2014/03/stencils-meet-metal-with-magdalena.html


Textile Art Retrospective – where did this all begin?

7 03 2016

I am in the process of finalising all the content for my first online comprehensive textile art class.  As I build the structure for the material, I find myself thinking back on the journey that bought me here.  Like many of you, I started sewing in my teens, did a lot of traditional hand embroidery and in the early 1990’s, morphed into patchwork when my babies came along.  In 2001, Unique Stitching was launched as a traditional patchwork business.  A number of issues brought me to the art quilt world.  First amongst them was a restlessness that made me want to try different things coupled with a strong sense of independence, demanding that I find my own style.  When I then could not find materials I wanted or if I found them the pricing was outrageous due to monopolies or restrained trade arrangements, I became determined to source and create my own products.

In 2005, I brought in Procion dyes and started dyeing ‘speciality’ fabrics: velvets, wools, silks and a world of different fibres.  At the end of 2005, I created my first sets of creative embroidery packs containing hand dyed velvet, silk jacquard, silk top, cocoons and thread.  I could have kissed the first person to buy one of my packs, such was my relief, at the Brisbane Craft and Quilt show where I launched that range.

In 2007, I launched the Art Quilt Collection (AQC).  This was the first time in Australia, and possibly the world, where there was a monthly mail out of textile art materials.  Each pack had a product, an explanation of that product and how to use it plus a simple project to create. Since that time, many have adapted my idea in different ways.  I had no idea what I had started, but it was clear that my future was definitely more on the art side of the page.  When I launched AQC, I hoped to get about 25 people to sign up.  In 2009, when we peaked at over 2500 participants and I was spending three weeks out of every four preparing the packs, I decided it was time to move on.

Since that time, we have expanded our ranges; I have taught around the world; been published in Quilting Arts Magazine; and been on QATV in the US.  It is a charmed life.  Now I want to spend a bit more time at home and the future for sharing what I know is increasingly teaching: face to face and online.

I hope that you can join me as this year will see lots of exciting online offerings, from me as well as a collective I am part of.  To find out more about my first Textile Art online class, go here:  http://tinyurl.com/z5ewlbg

Tomorrow I will talk about the Fiber Art Connection as it will be my day on our Blog Hop.

In the meantime, I want to share a few pieces of my first Art Quilt series.  This was part of my AQC work and mainly focused on manipulating and distressing fabric, with stress and heat.  This is now only one of many tools I use and each piece is a small, simple example, but it is nice to look back on.  This is not the full series, but gives you a sense.  It has an environmental theme.

AQC1 - Under the Watch of our Ancestors

Under the Watch of our Ancestors

AQC2 - Acid Rain

Acid Rain

AQC3 - Home in a Concrete Jungle

Home in a Concrete Jungle

AQC4 - Through Rose Coloured Glasses

Through Rose Coloured Glasses

AQC7 - Interconnectedness

Interconnectedness

AQC5 - Erosion

Erosion (the lighting on this is not very good, sorry)

AQC6 - Cellular Breakdown

Cellular Breakdown


12 Days of Christmas – Day 12 – Textile Art Kits

17 12 2015

If you are reading this, it is probably no surprise to you that I like to work with lots and lots of different fabrics to get a good mix of texuture and light reflection and refraction.  You can’t go past adding different types of fabrics to change the visual impact of a finished piece.  I have routinely been asked to create kits for some of my more textural quilts.   So, I have started doing that.  For today’s special, I offer 25% off any kits currently listed on the website while stock lasts.  I don’t have huge numbers of any of these kits.  To get the discount, you need to use the discount code Christmas15

Here is the link to Kits on the website:  http://www.uniquestitching.com.au/c/256569/1/kits.html

And here are pictures of the kits I have loaded up

Textured Garden sml

Scattered circles table runner sml

coneflower

Wild women newsletter version


art quilts in the making – it all starts with the backgrounds

5 12 2015

I seldomly have time to take photos when I am teaching. I don’t sit with my IPad or Phone at the ready and often get so absorbed in what I am doing that I get to the end of the day without taking any at all. When I do, I often don’t then do much with them. So I am going to try to rectify that. This post is about a three day class I did in New Zealand at One Tree Point with Kerry from Tulis Textiles.

The venue is fabulous. There is loads of space, inside and out; lots of tables and chairs; a full blown commercial kitchen and an enormous fire place – all of which we used.

The class was a three day class where we explored a huge range of surface design techniques with paint, foils, photo transfers, paper lamination, and so much more. We also looked at a range of what I call meltables: tyvek, lutradur, angelina, kunin felt etc. It was a lovely three days with the nicest people. I had a great time and ate way too much. I only seem to have taken photos on one day, but here are some photos of that days work.  You can click on them to make them bigger.

one tree 7  one tree 6  one tree 5  one tree 4

one tree 3  one tree 2  one tree 1  one tree 8


Cyclone Tracey Quilt Challenge through the Darwin Patchwork and Quilters

15 10 2014

Gosh, it is incredible to think that Cyclone Tracey was 40 years ago.  I was a child then, living in Mount Isa.  I remember very clearly the events that followed.  We had, for varying lengths of time, three seperate and very different family groups of Tracey refugees camped in our lounge and dining room while they transited through or waited for permission to return home.  It was my first exposure to people in crisis and the sometimes irrational behaviours that follows. One family had nothing to thank us with other than a boot full of canned foods, looted from a destroyed supermarket which they wanted to share with us.  Another family gave my sister and I a late Christmas gift, both costumes I think.  Mine was an Islander grass skirt and top.  Plenty of fodder there for a little quilt.  How would you commemorate this life changing and nation shaping event?

40 YEAR ANNIVERSARY
QUILT CHALLENGE
On Christmas Eve 1974, Darwin was destroyed by Cyclone Tracy.
The effect on people who lived through the cyclone was, and still is profound.
We invite you, the Quilters of Australia to make a quilt that reflects your depiction/memories of that time and Cyclone Tracy. You need not have lived in Darwin at the time, or experienced the cyclone, but remember it through different media/personal stories.
First Prize:
Second Prize:
Third Prize:
Viewer’s Choice Prize:
$250.00 $150.00 $100.00 $200.00
The quilt size is A4 (29.5 x 21 cm) and in portrait profile. The quilt must comprise of three layers and must be quilted. Any technique or combinations of techniques can be used to make the quilt. The finished quilt must have hanging sleeves on the top and bottom of the back of the quilt.
The quilts will become the property of Darwin Patchworkers & Quilters Inc. who will join the quilts together to create a community art piece.
Entries Close on the 1st December 2014. Entries should be posted or delivered to:
Cyclone Tracy Challenge
Darwin Patchworkers & Quilters Inc
PO Box 36945
Winnellie NT 0821
For further information please contact: Jan Cashion 0418 894 131 or
Pam Hamill 0412 213 600.


Painted Fabric transformed?

6 10 2014

In a couple of weeks, while I am teaching in Houston, I am have been invited to take part in the Open Studios programme.  I am doing two, two hour sessions.  One is on developing dimension, depth, movement etc with painted fabric backgrounds and the second is about creating and using monoprinted fabric in your projects.  I decided that I need some new samples.  I started with the first session, so have painted up half a dozen fat quarters of homespun with Dye Na Flow paint.  Now I am working into turning them into something.  The focus is, of course, the painted backgrounds, but it is about how they set a great framework for art quilts and other projects.

Here is the fabric I started with:

bird on the wire 1

I then auditioned some fabrics to go with it.  I started with a black fabric that I had gelli printed with golds and copper Lumiere Paint, added some rich, rust, hand dyed velvet and slate silk georgette.

bird on the wire 2

I stitched the power poles onto the background surface, put some gold/orange novelty yarn into the bobbin to ‘couch’ the electrical wires, created a focal point bird silhouette on the ground and three, ephemeral, transparent birds flying in the top right corner.  Basic quilting carries the eye along the line of the power poles.

bird on the wire 3

I am tempted to put two more silk georgette birds in the top left, but am resisting that for now.


See me in Australian Patchwork and Quilting.

5 08 2013

It has been a long time since I have had a quilt published in a magazine.  As a general rule, I don’t have time to make, write up and submit magazine articles.  However, I have set some new goals, one of which is about increasing my contributions here and overseas.  This is the first.  Australian Patchwork and Quilting Vol 22 No 11, page 106.

??????????

What do you think?


Quilting Arts is on the web and I have added my Jan/Feb news

28 01 2012

I got the new Quilting Arts a couple of days ago, but it has taken me a bit to get it on the web and the subscriptions out.  I love this edition.  Some of my favourite people are in it: Jane DaVila, Judy Coates Perez, Jane LaFazio, Susan Brubaker Knapp, and Kathy York.  Not to mention a fabulous article on the 12 by 12 quilts with Brenda Gail Smith.  Love it.

And this is the news that will be going in mail orders for the rest of this month and February.  I thought you might like to have a look.  I will start loading these on the blog as I prepare them.  News from Unique Stitching January


“Unique Textile Art” Classes at Rosehill Craft and Sewing Show.

26 01 2012

Following on from my previous post, I have now locked down the timing for my classes in a studio as part of my stand in Rosehill.  The Rosehill Craft and Sewing Show runs from 10.00 to 4.30 each day from 8th to 11th of March 2012.  It is at the Rosehill Race Course.  It is NOT the Stitches and Craft Show, which no longer exists.  The website for the show is here: http://www.craftandsew.com.au/.  All the workshops and events will be published there in the next few weeks.

So, three classes: one using Procion Dyes and two exploring some of the newer mediums such as TAP, Lutradur, Angelina, Foils, Bonding Powder, Inktense Pencils and other surface colouring products.  All three classes cross over a range of experience, from absolute beginners to people who have started playing with these media but are not sure where to go next.  There will be plenty of ideas and information shared but most importantly you will get hands on and try things for yourself and I guarantee you will have fun.  Each class will run for about an hour, with a bit of slippage.  Numbers will be strictly limited.

You can book at the stand on the day or prebook on www.uniquestitching.com.au.  I will hold places in each class every day for bookings on the stand but if you know you and/or your friends definitely want to do the class it would pay to prebook.

The first class starts at 11.00 each day and will be focused on the Angelina and Lutradur.  You can make Artist Trading Cards (ATCs), fabric postcards, or bookmarks.  Here are a couple of examples

The second class will be a dying class using Procion Dyes on cotton Fat eighths. It will run from13.15 each day.  You can choose three colours to blend to make 6 different colours.  Traditional colourways will be blue, red, yellow like this:

or a less traditional combination such as red, orange, purple like this:

other alternatives will be three blues or three greens, or three purple/pinks.

The third class is brand new, so much so that I only finished the sample in time to send the photo for inclusion.  It will run from 14.30 each afternoon.  This one explores Transfer Artist Paper (TAP), foils and a couple of colour products, predominantly the inktense blocks.  You will create a piece of embellished fabric that you can use as a small wall hanging, a cushion centre, a feature fabric or pretty much anything.  Here is my sample.  You can add more colours or more depth of colour with a couple of different products.

this sample is a bit crocked.  You will be given rulers so you don’t rush it like I did.  I am calling this Adelaide River because some of the images came from there and it is a place that has impacted on me.  I have tried to capture the poignancy of the location in the piece, but we will talk about using colour to add emotion to a project.

In the middle of all of this, somewhere between 12.00 and 13.00 I will do a traditional workshop in the workshop rooms on using different fabrics in your patchwork and quilting projects.

I hope that there is something here to tempt all of you living in the Sydney/NSW area and that you will join me.  Of course we will also have our full range of colour, fibre, fabric products; magazines and books; and so much more.

I will run similar classes (though not necessarily the same) in Perth, Sydney, Melbourne and Brisbane also this year.  See you there.