I love dyeing fabric. I do, I just love it. I could easily spend all my waking time making things colourful with dye and yet, I have resisted the growing trend of ice dyeing until quite recently. Why have I avoided it? Why have I ice dyed lately? Let me explain.
What is it?
My observation is that ice dyeing morphed out of snow dyeing. Snow dyeing became a thing when the dyers in the Northern hemisphere started experimenting on how they could feed their dyeing addiction in the middle of great drifts of snow. Snow or ice dyeing gives a very different effect than the traditional Procion dyeing techniques. The chemistry is a bit ‘wrong’ and on one level, does not make a huge amount of sense. As a result, ice dyeing gives softer, more drifty colours. Also, the dye powder is dispersed by the melting ice, the colour distribution can be very loose and ad hoc; organic almost. It is an interesting technique to play with.
Why I avoided it.
There are a number of reasons for this:
- it does not feel safe – measuring out large amounts of dry dye powder and leaving it on top of the ice until it melts means that lots of loose dye particles can become airborne;
- it is not very efficient – you use more dye to get a less vibrant effect than all the more common techniques;
- it can be costly – both in dye and ice. Unless you have a large ice making capacity and don’t have access to lots of snow, you will go through a lot of ice and it can add up.
Why I gave it a go.
I have seen the results others were getting and they can be very beautiful. Ice dyeing has become very popular in the tie dyeing community. I am not a fan of the full on, 1970s tie dyed mandalas, etc, but I do like a slightly modified, less planed version of ‘tie dyeing’. (And I don’t actually tie unless I am doing shibori as this creates work)
This post is not going to be a comprehensive tutorial on the technique, but I do want to show you the results I got.
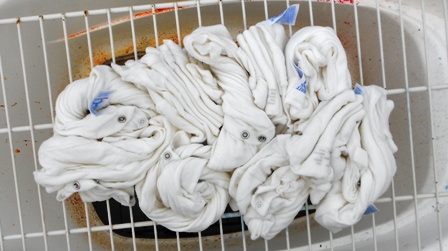
Fold, scrunch, pleat or bundle your fabric or items to be dyed. Place on a rack of some sort with a vessel underneath to catch melting dye.
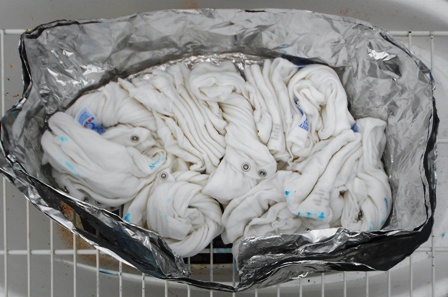
If you want to, create a cuff either with your bucket/vessel or with foil.
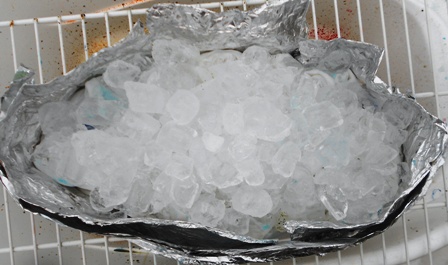
Cover in ice.
Cover with dye.
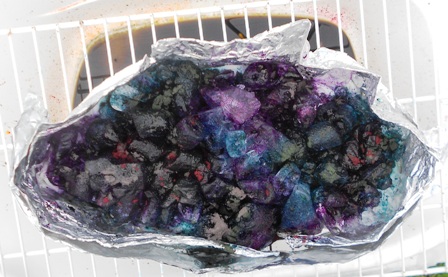
Walk away and leave it alone until all the ice has melted and the dye distributed. I left each batch over night and rinsed out the next morning.
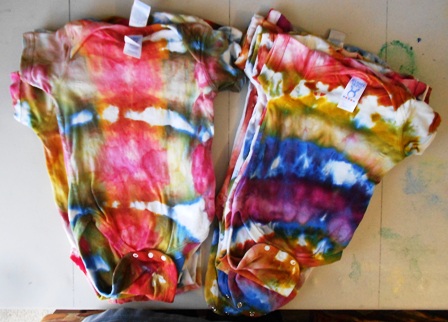
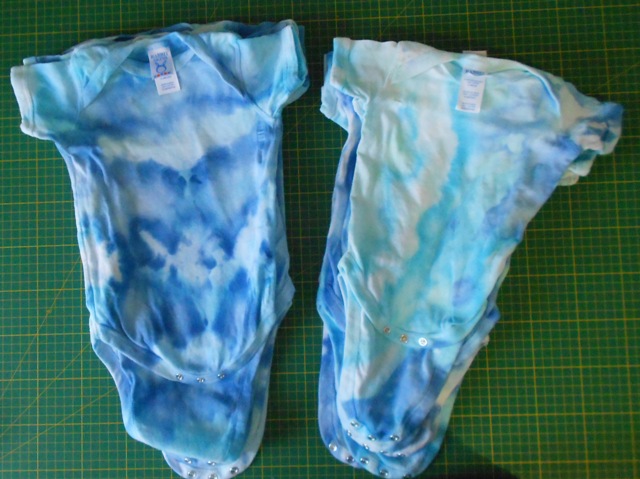
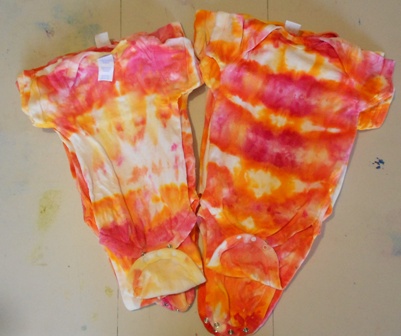
Here are some of my results.
If you would like to learn a lot more about dyeing fabric, check out my very comprehensive Almost Alchemy online dyeing class. We start with Ice Dyeing. Details can be found here:


Leave a comment